9 Steps to Patch a Hole in a Plastic Garden Cart
A cracked plastic garden cart bleeds soil onto flagstone paths and drains precious compost into gravel. The polymer fractures under freeze-thaw cycles, UV bombardment, and the shear force of fifty-pound loads. Steps for patching a hole in a garden cart restore structural integrity, extend service life by five to ten years, and preserve the mycorrhizal fungi and beneficial bacteria you've cultivated in your potting mixes. This repair protocol draws on polymer chemistry and field-tested adhesion techniques used in commercial greenhouse operations.
Materials
Gather materials with an eye toward cation exchange capacity and adhesion coefficients. You will need:
- Two-part epoxy putty: Marine-grade formulations withstand pH ranges from 4.5 to 8.0, critical when hauling sulfur-amended soil or lime. Select products with 3,000 psi tensile strength.
- Plastic welding kit: Includes polyethylene or polypropylene filler rods matched to cart resin type. Check the recycling symbol on the cart base.
- Denatured alcohol: 70% isopropanol works, but denatured alcohol (ethanol with methanol denaturant) removes oxidized polymer layers more effectively.
- 120-grit sandpaper: Abrasion increases surface area for mechanical bonding, mimicking root hair proliferation in high-CEC soils.
- Acetone: Use only on ABS or polystyrene. Polyethylene and polypropylene resist acetone; skip this for those resins.
- Fiberglass cloth patch (optional): 4-inch squares of 6 oz./sq. yd. cloth reinforce large breaches, much like lignin reinforces cellulose in woody stems.
- Heat gun: Variable temperature (300–600°F) for plastic welding. Avoid flame torches; they carbonize polymers.
No NPK amendments apply here, but think of epoxy as analogous to a 0-0-0 structural amendment. It provides mechanical support without altering nutrient profiles.
Timing
Perform repairs when ambient temperature holds between 60°F and 85°F. Epoxy curing rates drop below 50°F, extending set time from five minutes to twenty. In USDA Hardiness Zones 5–7, schedule repairs between late April and mid-October. Zones 8–10 allow year-round work, but avoid midday summer heat above 95°F; softened plastic deforms under pressure. If frost threatens within 48 hours, delay the repair. Frozen substrates contract, and differential thermal expansion can crack fresh bonds.
Phases

Preparation
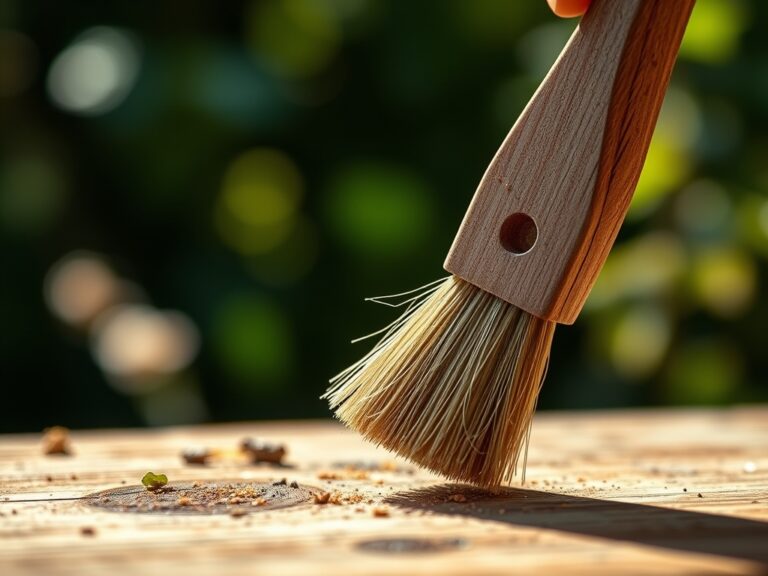
Empty the cart completely. Residual soil acts like a low-pH contaminant, interfering with epoxy cross-linking. Brush away loose debris, then wipe the damaged zone with denatured alcohol. Sand a 2-inch perimeter around the hole using 120-grit paper in overlapping circles. This abrasion mimics tillage at the micro-scale, creating anchor points for adhesive penetration. Wipe again with alcohol to remove polymer dust.
Pro-Tip: Examine the hole's edges under raking light. Stress cracks radiate from impact points like auxin distribution pathways. Sand these microfractures to prevent propagation.
Application
For holes under 0.5 inches, knead two-part epoxy putty until uniform in color. Press firmly into the breach, overfilling by 1/8 inch. Smooth with a wet finger to eliminate air pockets, which act like voids in potting media and reduce load-bearing capacity. Allow to cure per manufacturer's instructions, typically 60 minutes at 70°F.
For larger holes (0.5 to 3 inches), deploy plastic welding. Set the heat gun to 450°F for polyethylene, 500°F for polypropylene. Hold the nozzle 1 inch from the hole's edge until the plastic softens and glosses. Feed filler rod into the molten zone at a 45-degree angle, moving steadily to avoid char. Build up three layers, allowing 30 seconds between passes for partial cooling.
Pro-Tip: Add a fiberglass cloth patch to holes exceeding 2 inches. Wet the cloth with catalyzed epoxy resin, press onto the repair, then apply a final epoxy coat. This composite structure mirrors xylem and phloem bundling in vascular plants.
Curing and Testing
Cure time depends on resin chemistry and temperature. Epoxy putty reaches handling strength in one hour, full strength in 24 hours. Plastic welds solidify in five minutes but require 12 hours before load-bearing. Test by filling the cart with water to 50% capacity. Inspect for seepage. If leaks appear, drain, dry thoroughly, and add a second epoxy layer.
Pro-Tip: Post-cure epoxy patches by parking the cart in full sun for four hours. UV exposure completes polymerization, much like vernalization triggers flowering in biennials.
Troubleshooting
Symptom: Patch debonds within one week.
Solution: Insufficient surface prep. Re-sand to bare plastic, increasing abrasion area to 3 inches. Confirm resin compatibility; polyethylene requires specialized primers.
Symptom: Epoxy remains tacky after 24 hours.
Solution: Low ambient temperature or incorrect resin mixing ratio. Move cart to a 75°F space. If still tacky, scrape off and reapply, measuring hardener precisely.
Symptom: Plastic weld fractures along seam.
Solution: Excessive heat carbonized the polymer. Grind out the failed weld, reduce gun temperature by 50°F, and reweld with slower passes.
Symptom: Hairline cracks radiate from repair.
Solution: Stress concentration from abrupt transitions. Feather the patch edges with 220-grit sandpaper to distribute load like a gradual soil profile transition.
Maintenance
Inspect patches monthly during active growing season. Apply UV protectant spray (SPF 50 equivalent for polymers) every six months. Store carts under shade cloth or in a shed when not in use; direct sunlight degrades polyethylene at 0.5% per year. Limit loads to 75% of manufacturer's rating post-repair. Wash with pH-neutral soap; acidic or alkaline cleaners attack epoxy bonds. Recoat epoxy patches annually with a thin layer of marine sealant to maintain waterproofing.
FAQ
How long does a patched cart last?
Properly executed repairs restore 80–90% of original strength. Expect five to eight additional years of service.
Can I use duct tape instead?
Duct tape fails under soil moisture and UV within three weeks. It serves only as a temporary field repair.
What if I don't know my cart's plastic type?
Perform a float test. Polyethylene and polypropylene float in water; ABS and polystyrene sink. Use epoxy putty for floaters, solvent cement for sinkers.
Do I need to reinforce carts preventatively?
Yes. Apply fiberglass cloth to the cart floor before cracks appear, especially in Zones 3–5 where freeze-thaw cycles accelerate fatigue.
Can I patch while soil remains inside?
No. Soil retains moisture and harbors microbes that degrade uncured epoxy. Always empty and dry before repair.