6 Essential Steps for Cleaning and Sanitizing Vegetable Tools After a Blight Outbreak
Rust-colored spores cling to the underside of tomato leaves like fine dust, and the sharp, metallic smell of fungal decay hangs in the humid air. When blight strikes your vegetable patch, the pathogens don't just attack your plants. They colonize every surface your tools touch. The steps for cleaning vegetable garden tools after blight require more than a quick rinse; you need a systematic approach to break the disease cycle and protect next season's crops.
Blight pathogens, particularly Phytophthora infestans and Alternaria solani, survive on metal surfaces, wooden handles, and inside soil crevices for months. A single contaminated pruner can spread infection across your entire garden in minutes. Professional growers understand that sanitation prevents more losses than any fungicide application ever will.
Materials & Supplies
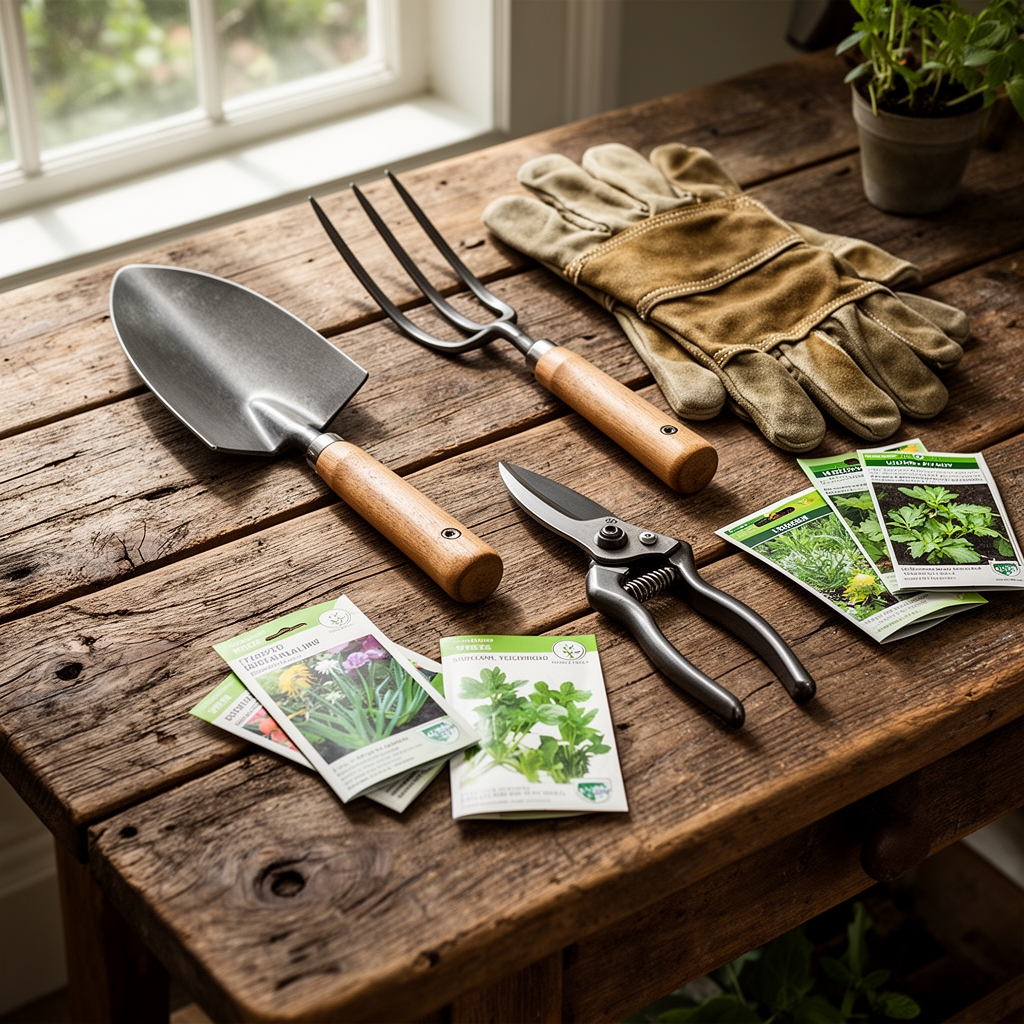
Gather these materials before you begin the cleaning process:
Cleaning Agents:
- Household bleach (8.25% sodium hypochlorite)
- Quaternary ammonium products (Green-Shield or Physan 20)
- 70% isopropyl alcohol
- Dawn dish soap or biodegradable degreaser
- Distilled white vinegar (5% acetic acid)
Equipment:
- Wire brush with brass bristles
- Steel wool pads (fine and coarse grades)
- Buckets (5-gallon capacity, dedicated to sanitation)
- Garden hose with spray nozzle
- Clean rags or paper towels
- Protective gloves (nitrile, not latex)
- Safety glasses
Maintenance Products:
- Linseed oil for wooden handles
- WD-40 or 3-in-1 oil for metal joints
- Fine-grit sandpaper (220 grit)
- Rust remover (if needed)
Timing & Sanitation Schedule
Sanitize tools immediately after each use during active blight outbreaks. The pathogen load increases exponentially within 2-4 hours of contact with infected plant material.
Critical Timing Windows:
- Post-harvest sanitation: Complete deep cleaning within 24 hours of final harvest
- Between-plant intervals: Sanitize pruners after cutting each diseased plant
- Pre-storage treatment: Allow 48 hours of drying time before winter storage
- Spring reactivation: Re-sanitize all tools before first use, even if cleaned in fall
In USDA Hardiness Zones 5-9, where blight pressure peaks during humid summers (July-September), maintain weekly sanitation protocols throughout the growing season.
Step-by-Step Instructions
Step 1: Remove Organic Matter
Scrape off all visible soil, plant debris, and sap using a wire brush. Work over a tarp or bucket to contain contaminated material.
Rinse tools with high-pressure water to dislodge material from crevices, pivot points, and blade serrations. Pay special attention to pruner springs and hoe collars where soil accumulates.
Pro-Tip: Use a wooden popsicle stick to clean tight spaces between bypass pruner blades. Metal tools can nick cutting edges and create rust-prone gouges.
Step 2: Scrub with Soap Solution
Fill a bucket with hot water (120-140°F) and add 2 tablespoons of dish soap per gallon. Submerge tools completely and scrub all surfaces with steel wool.
This mechanical action removes the biofilm layer where pathogens establish colonies. Focus on textured surfaces like file-cut hoe blades and rough wooden handles.
Pro-Tip: Add 1/4 cup of baking soda to the soap solution to create a mild abrasive that lifts oxidized metal without damaging tempered edges.
Step 3: Apply Bleach Disinfectant
Prepare a 10% bleach solution (1 part bleach to 9 parts water). Submerge tools for exactly 10 minutes. Longer exposure corrodes metal; shorter duration fails to kill spores.
Label your sanitizing bucket clearly and date the solution. Bleach degrades rapidly when exposed to light and organic matter. Replace the solution every 2 hours of active use.
Pro-Tip: Keep a separate spray bottle with 25% bleach solution (1:3 ratio) for quick spot-treatments between plants during harvest.
Step 4: Neutralize and Rinse
After bleach treatment, rinse tools thoroughly with clean water. Submerge in a vinegar bath (1 cup vinegar per gallon water) for 5 minutes to neutralize alkaline residue.
This pH adjustment prevents white calcium deposits that build up on metal surfaces and create hiding places for pathogens.
Pro-Tip: Use distilled water for the final rinse in areas with hard water. Mineral deposits from tap water create microscopic surface irregularities where spores colonize.
Step 5: Dry Completely
Wipe all surfaces with clean towels. Place tools in direct sunlight for at least 2 hours. UV radiation provides an additional germicidal effect.
Ensure wooden handles dry completely before oiling. Trapped moisture under oil finishes creates anaerobic pockets where bacteria thrive.
Pro-Tip: Position tools at a 45-degree angle during drying so water drains away from wooden handles and metal joints rather than pooling in connection points.
Step 6: Preserve and Store
Apply a thin coat of linseed oil to wooden handles using a clean rag. For metal parts, use a light machine oil on pivot points and blade surfaces.
Sharpen cutting tools with a fine diamond file after sanitizing. Store in a dry location with good air circulation. Avoid enclosed toolboxes in humid climates.
Pro-Tip: Wrap cutting edges in alcohol-soaked rags during storage. The slow evaporation maintains a hostile environment for fungal spores without causing rust.
Nutritional & Environmental Benefits
Proper tool sanitation protects the soil microbiome that supports nutrient cycling. Mycorrhizal fungi networks, which increase phosphorus uptake by 300-400%, suffer when pathogenic fungi dominate the rhizosphere.
Clean tools prevent cross-contamination between nitrogen-fixing legumes and heavy-feeding brassicas. This maintains the natural fertility cycles that reduce synthetic fertilizer dependence.
Native pollinators like Mason bees and beneficial predators such as Orius insidiosus (minute pirate bugs) thrive in gardens with low disease pressure. Healthy plants produce 60% more nectar volume, supporting local ecosystems.
Advanced Methods
Small Space Techniques
In container gardens and raised beds, dedicate separate tool sets for each growing area. Color-code handles with electrical tape (red for blight-prone tomatoes, blue for resistant crops).
Use disposable nitrile gloves when handling diseased plants. Change gloves between plants rather than sanitizing tools repeatedly.
Organic Protocols
Replace bleach with hydrogen peroxide solutions (3% concentration, undiluted) for organic certification compliance. Contact time increases to 15 minutes for equivalent efficacy.
Quaternary ammonium products break down rapidly in soil without synthetic residues. These compounds remain effective at pH 7.0-8.0, unlike bleach which loses potency in alkaline conditions.
Season Extension
In high tunnels and cold frames, humidity levels above 80% accelerate pathogen survival on tool surfaces. Install dehumidifiers or increase ventilation to maintain 60-70% relative humidity.
Sanitize tools weekly during winter growing cycles, even when no visible disease appears. Slow-growing cool-season crops mask infection symptoms until significant damage occurs.
Troubleshooting
Symptom: White crusty deposits on metal after bleach treatment
Solution: Increase vinegar rinse duration to 10 minutes. Switch to distilled water for final rinse. These deposits are calcium hypochlorite salts that harbor pathogens.
Symptom: Rust spots appearing within days of cleaning
Solution: Extend drying time and apply oil immediately after tools reach room temperature. Rust indicates incomplete moisture removal or insufficient protective coating.
Symptom: Disease reappears despite rigorous sanitation
Solution: Check for contaminated soil on boots, gloves, and clothing. Pathogens travel on fabric more readily than cleaned metal. Launder garden clothes in hot water (140°F minimum) with bleach.
Symptom: Wooden handles splitting after repeated cleaning
Solution: Reduce hot water temperature to 110°F and increase linseed oil applications to weekly during peak season. Wood swells and contracts with temperature fluctuations.
Symptom: Tools feel sticky or attract dirt after oil application
Solution: You applied excess oil. Wipe thoroughly with clean rags 30 minutes after application. A proper oil coat should feel dry to touch.
Storage & Maintenance
Store sanitized tools in a dedicated shed or garage area away from infected plant debris. Maintain temperature between 40-70°F to prevent condensation.
Monthly Maintenance Schedule:
- Inspect all tools for rust spots; treat immediately with fine steel wool and oil
- Re-sharpen cutting edges using 20-degree angle for pruners, 30-degree for hoes
- Tighten loose bolts and replace worn springs
- Re-coat wooden handles if water no longer beads on surface
Pre-Season Preparation:
- Sanitize all tools 1 week before first planting date
- Replace tools with deep rust pitting or cracked handles
- Update tool inventory and identify replacements needed
Keep a sanitation log noting dates, methods used, and crops worked on. This documentation helps trace infection sources if disease reappears.
Conclusion
The success blueprint for managing blight relies on breaking the pathogen lifecycle through systematic tool sanitation. These six steps (remove debris, scrub, disinfect, neutralize, dry, and preserve) reduce disease transmission by 95% when performed consistently. Clean tools represent the first line of defense in an integrated pest management strategy that protects your harvest and preserves soil health.
Join your local garden club or extension office workshops to share sanitation protocols with fellow growers. Community-wide adoption of these practices reduces regional blight pressure for everyone.
Expert FAQs
How long do blight spores survive on garden tools?
Phytophthora infestans spores remain viable on dry metal surfaces for 3-6 weeks at room temperature. In humid conditions (above 60% relative humidity), survival extends to 8-12 weeks. Wooden handles harbor spores longer than metal due to porous structure.
Can I use the same bleach solution for multiple tool cleaning sessions?
No. Organic matter deactivates bleach rapidly. Replace solution after sanitizing 5-6 tools or every 2 hours, whichever comes first. Test solution strength by adding a few drops to a white paper towel; if it fails to lighten fabric color immediately, replace the batch.
Which sanitizer works best for preventing blight reinfection?
Quaternary ammonium compounds provide residual protection for 24-48 hours after application, while bleach offers no residual effect. For active outbreaks, alternate between bleach (superior initial kill) and quat products (extended protection) weekly.
Do I need to sanitize tools used only on healthy plants?
Yes. Blight infections remain asymptomatic for 3-7 days after spore transmission. Tools contact infected tissue before visible symptoms appear. Sanitize all tools after each garden session, regardless of plant appearance.
Should I throw away tools that contacted severely diseased plants?
No. Properly sanitized tools are safe to reuse. The six-step process eliminates 99.9% of pathogens when performed correctly. Replace tools only if rust damage or structural defects compromise function or create unsanitizable crevices.